Bringing Magic to Life — Creating Your Own Command Beacon
February 20, 2018 by
Kya Vess 

Hey Everyone, Kya here once again!
So for this article I decided to do something a little different. Normally I end up putting up a list of one of my personal decks and add in a few models to add some life into them. However, today I figured it would be more fun to breath some Magic into my home instead! As I mentioned in my previous articles, one of the best ways to get a friend into EDH for the first time is to start their adventure in the safety and comfort of your own home. After all, you don't start your D&D campaign in the middle of a jungle. You start in the (normally) safe town to get accustomed to the game first. Before we invite our friends over though, let's make sure the atmosphere is inviting. Of course you want a clean apartment or house before inviting anyone over... but let's see what else we can do to make sure they have a really good time!
Word of caution! This is not going to be the step to step tutorials I normally provide. There's a lot to cover and I have a word limit here so we're going to power through these home decorations!
Tabletop Madness
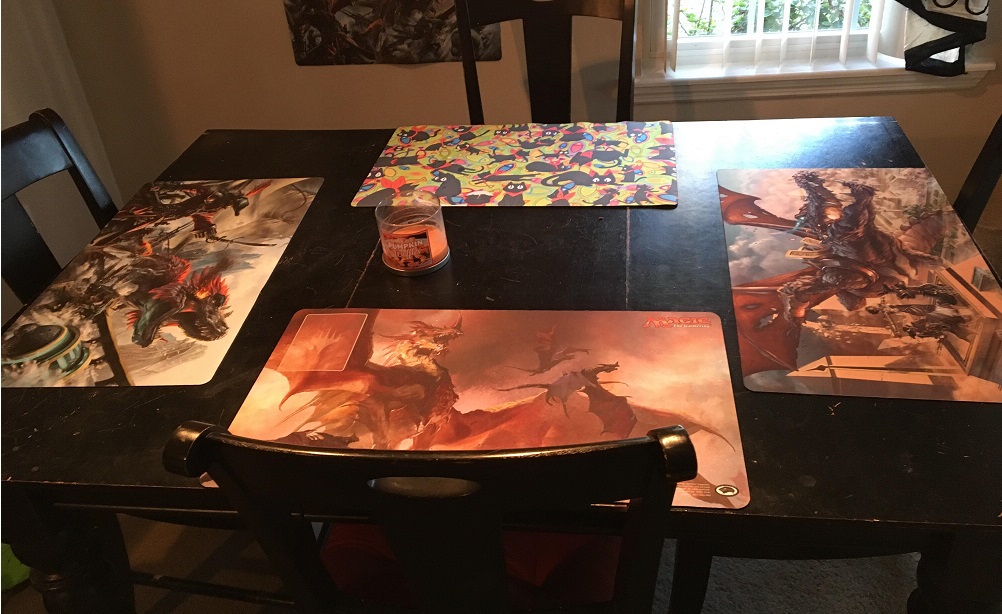
It all starts with the table. The little piece of wood with legs that hosts all of our adventures. Now you can use your dining room table or a separate table all together, as long as there is enough room for everyone to enjoy their time. Lets begin with this table here we picked up. The table is a bit scratched up but we can fix that up with some playmats. The key thing when making an EDH-friendly home is to not assume people have their gear. Extra decks and playmats go a long way! Might not look great now, but we have so much more to add!
As previously mentioned, we need to make sure we're prepared in case our traveling Planeswalkers are not. Sometimes your buddy might forget his dice or tokens. So how do we prepare for this?
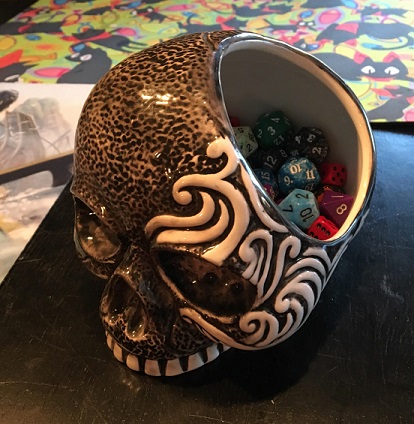
A skull of dice! Another random pick up from my shopping adventures. This was actually something I found at HomeGoods. Nothing beats picking for some brains while looking for extra counters for your tokens! We could be done with just the playmats and dice ... but you should all know me better by now. We have to get way more creative before I'm happy.
Hipster Coasters by the Coast
Now I'm a girl who enjoys a nice refreshing drink while trying to keep up with my chaotic triggers from Eye of the Storm. Especially when I end up casting Cruel Entertainment the turn after. Or maybe I need a lot of coffee if I'm playing against a mono blue player... But where are my drinks going to go? On the table? What am I, some heathen? Yidris taught me better then this. We have to get coasters. But not just any coasters, Magic Coasters!
So lets go turn on our computer and start up our 3D software. It's time to make some coasters! But where do we begin?
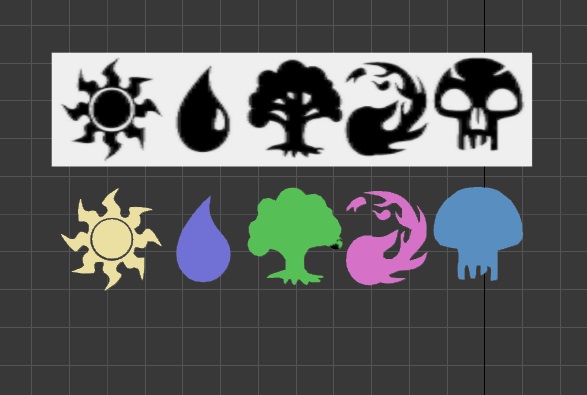
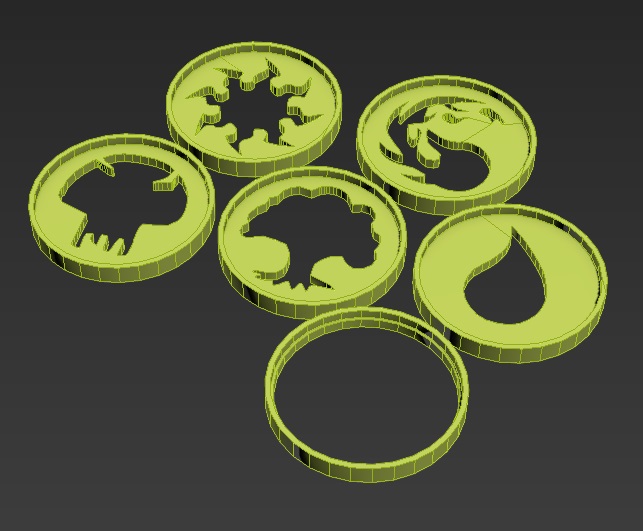
Like we mentioned in my previous articles, it all starts with finding an image online that we want to trace. Now in an effort to keep this article short, I've added the trace without the steps. Remember, it all begins with a square people!
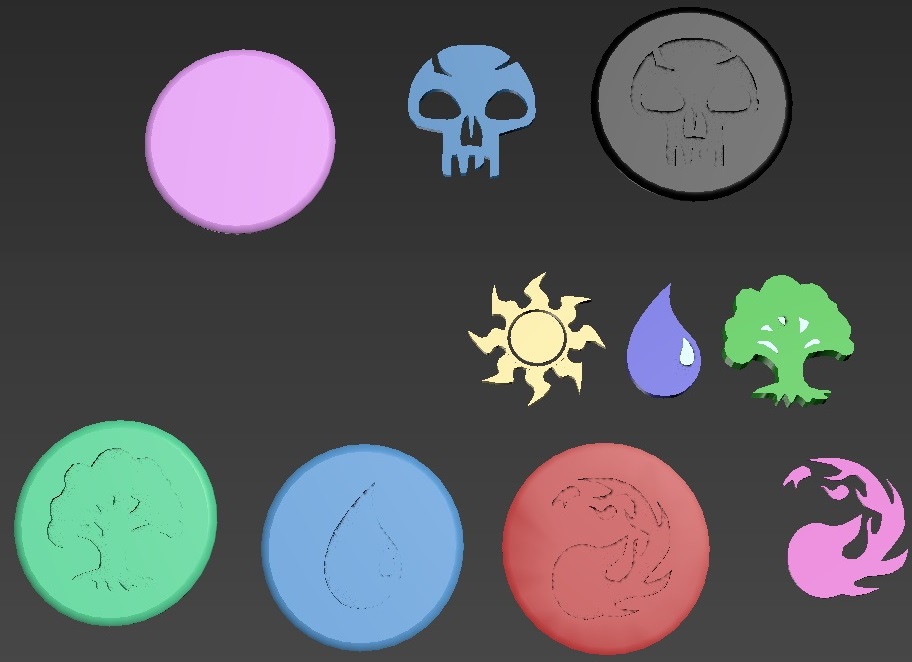
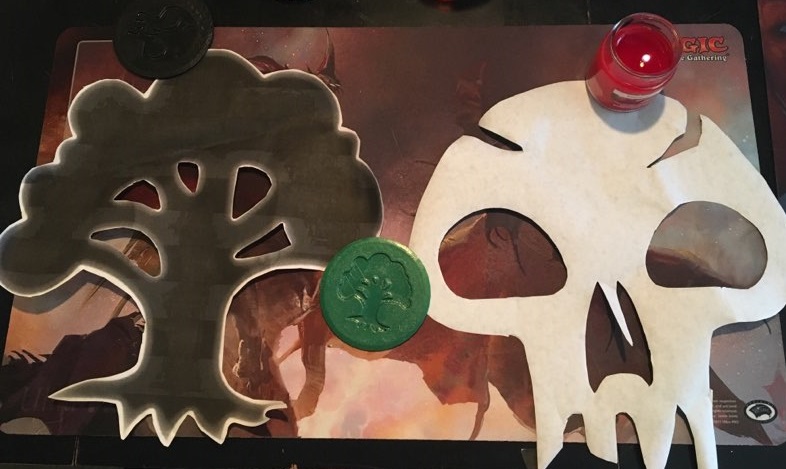
Now lets take our shapes and imprint them on our coasters. I made a cylinder and trimmed the rim of them to give that nice coaster feel. Then all I did was subtract from the mana symbols I made and we're done! Wasn't that easy? Lets print them out!
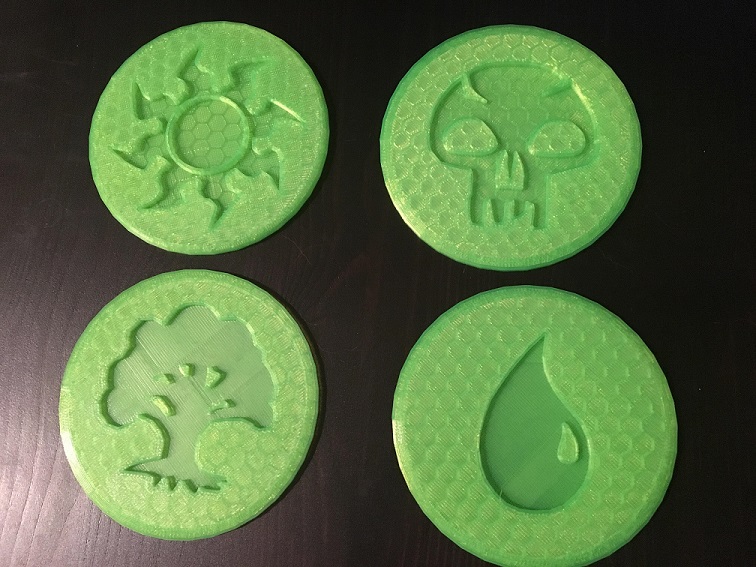
After some quick printing, the coasters are ready to paint. I almost feel guilty painting them because of the cool hive textures from the print... but condensation insists!
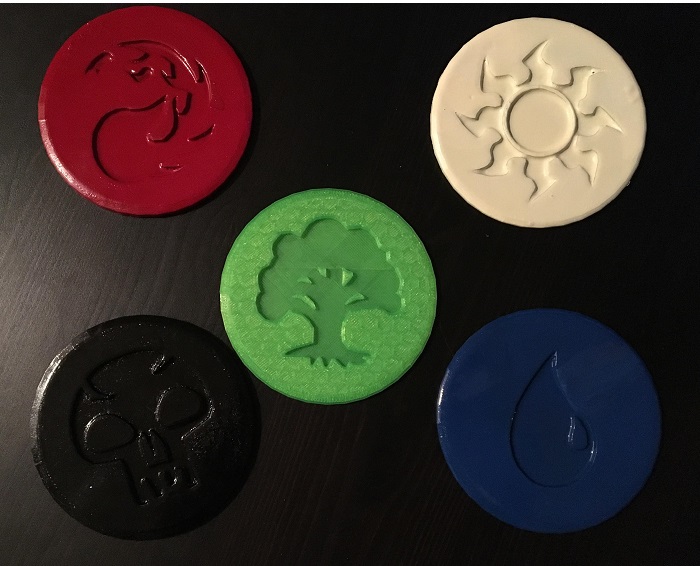
After a bit of spray pain, we're all set! All I did was add a few coats and my coasters are done! I left the green alone because again, that cool texture. Now we can enjoy our beverages while we spell sling! Remember to cast responsibly!
Coaster Download: Coasters
Hungry for Mana
Oh I forgot something! Because we already have the main parts, let's make some snacks as well! We need food to energize the Planeswalkers we invited. Without going into too much detail, I used those mana symbols to make some cookie cutters as well:
I avoided the details like the drop within the drop for blue mana or the eyes for the skull. With small prints its always better to avoid silly detail. Now with some colored frosting you can get almost anywhere, let's bake some cookies! The imagine below looks inverted, because they cut when used upside down!

Picked up some sugar cookie dough and started making small circles of dough. I didn't have a roller so I had to use the back of my Caster Gun prop to roll it...

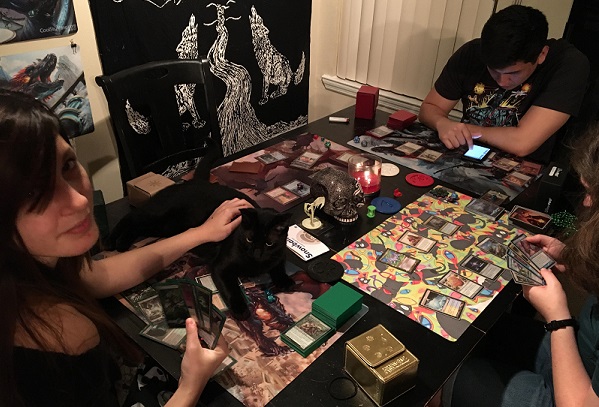
Clementine the Master Chef is ensuring I make these cookies properly.
I used the empty circle to cut them out and then the symbols for the frosting. I recommending refrigerating the frosting in the cutters before removing them to make things easier, especially if doing layers.
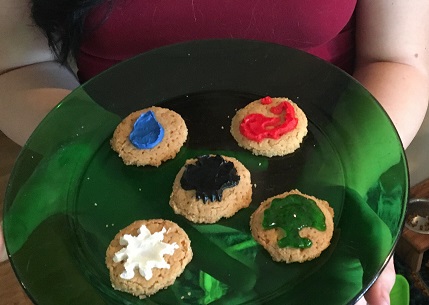
Mmm. Can you taste the power? We've proven in our household that I'm a blacksmith, not a baker. Originally I was going to do a layer of frosting of the color then the symbols in black... but people changed plans on me! That's another thing to look out for when hosting...
Download for Cookie Cutters: Cookie Cutters
Notice me, Sensei
Now that we have the goodies set for the table we can begin with our games. Wait a second! I almost forgot our life counters! What did you say? Use dice? You're the same kind of person that won't use a coaster I bet! I'm not some sort of uncivilized swine that partakes in the use of a common man's dice! Oh no, its time for some Sensei Top Life Counters! One for each guest so they can keep track of their life and spin out of boredom when my Yidris starts to Cascade! Below was actually painted by an LGS member, didn't he do such a great job?
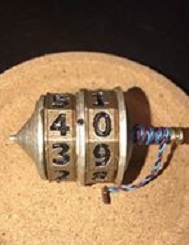
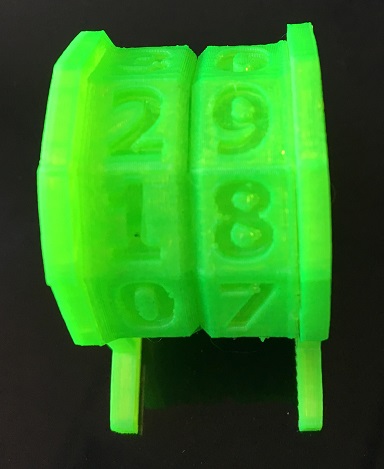
Now this one I'm going to leave as a slight mystery. Sorry fellas but this and Bolas are some models I'm far too proud of to share! I'll give you a hint though on how I made it below:
The process isn't that hard, honest! For those who think this is too complicated, you could always make a standard life counter. It's a little too similar to the Wizard's product in the Commander Anthology set, so no downloads! If I had those life counters myself, I would proudly have those on the table instead. Why does everything cost money ;.;
Unbanning Painter's Servant
Now then, with our table complete we can finally get our game on. However something's not quite right. The area still looks a bit bland. Why not turn our little area into a full fledged game room? Let's spice up these walls and give our little piece of heaven that local game shop feel!
What we're going to need is a few canvases and some spray paint. What I did is I grabbed 2 colors for each mana symbol. So for example for red mana, I got a light and slightly darker red. None of this was too expensive when it comes to making timeless art. Most importantly though we're going to need some cutouts that we can cover over while we spray paint! Now let me show you something real quick. Here is the difference between being artistic and being smart about your crafts:
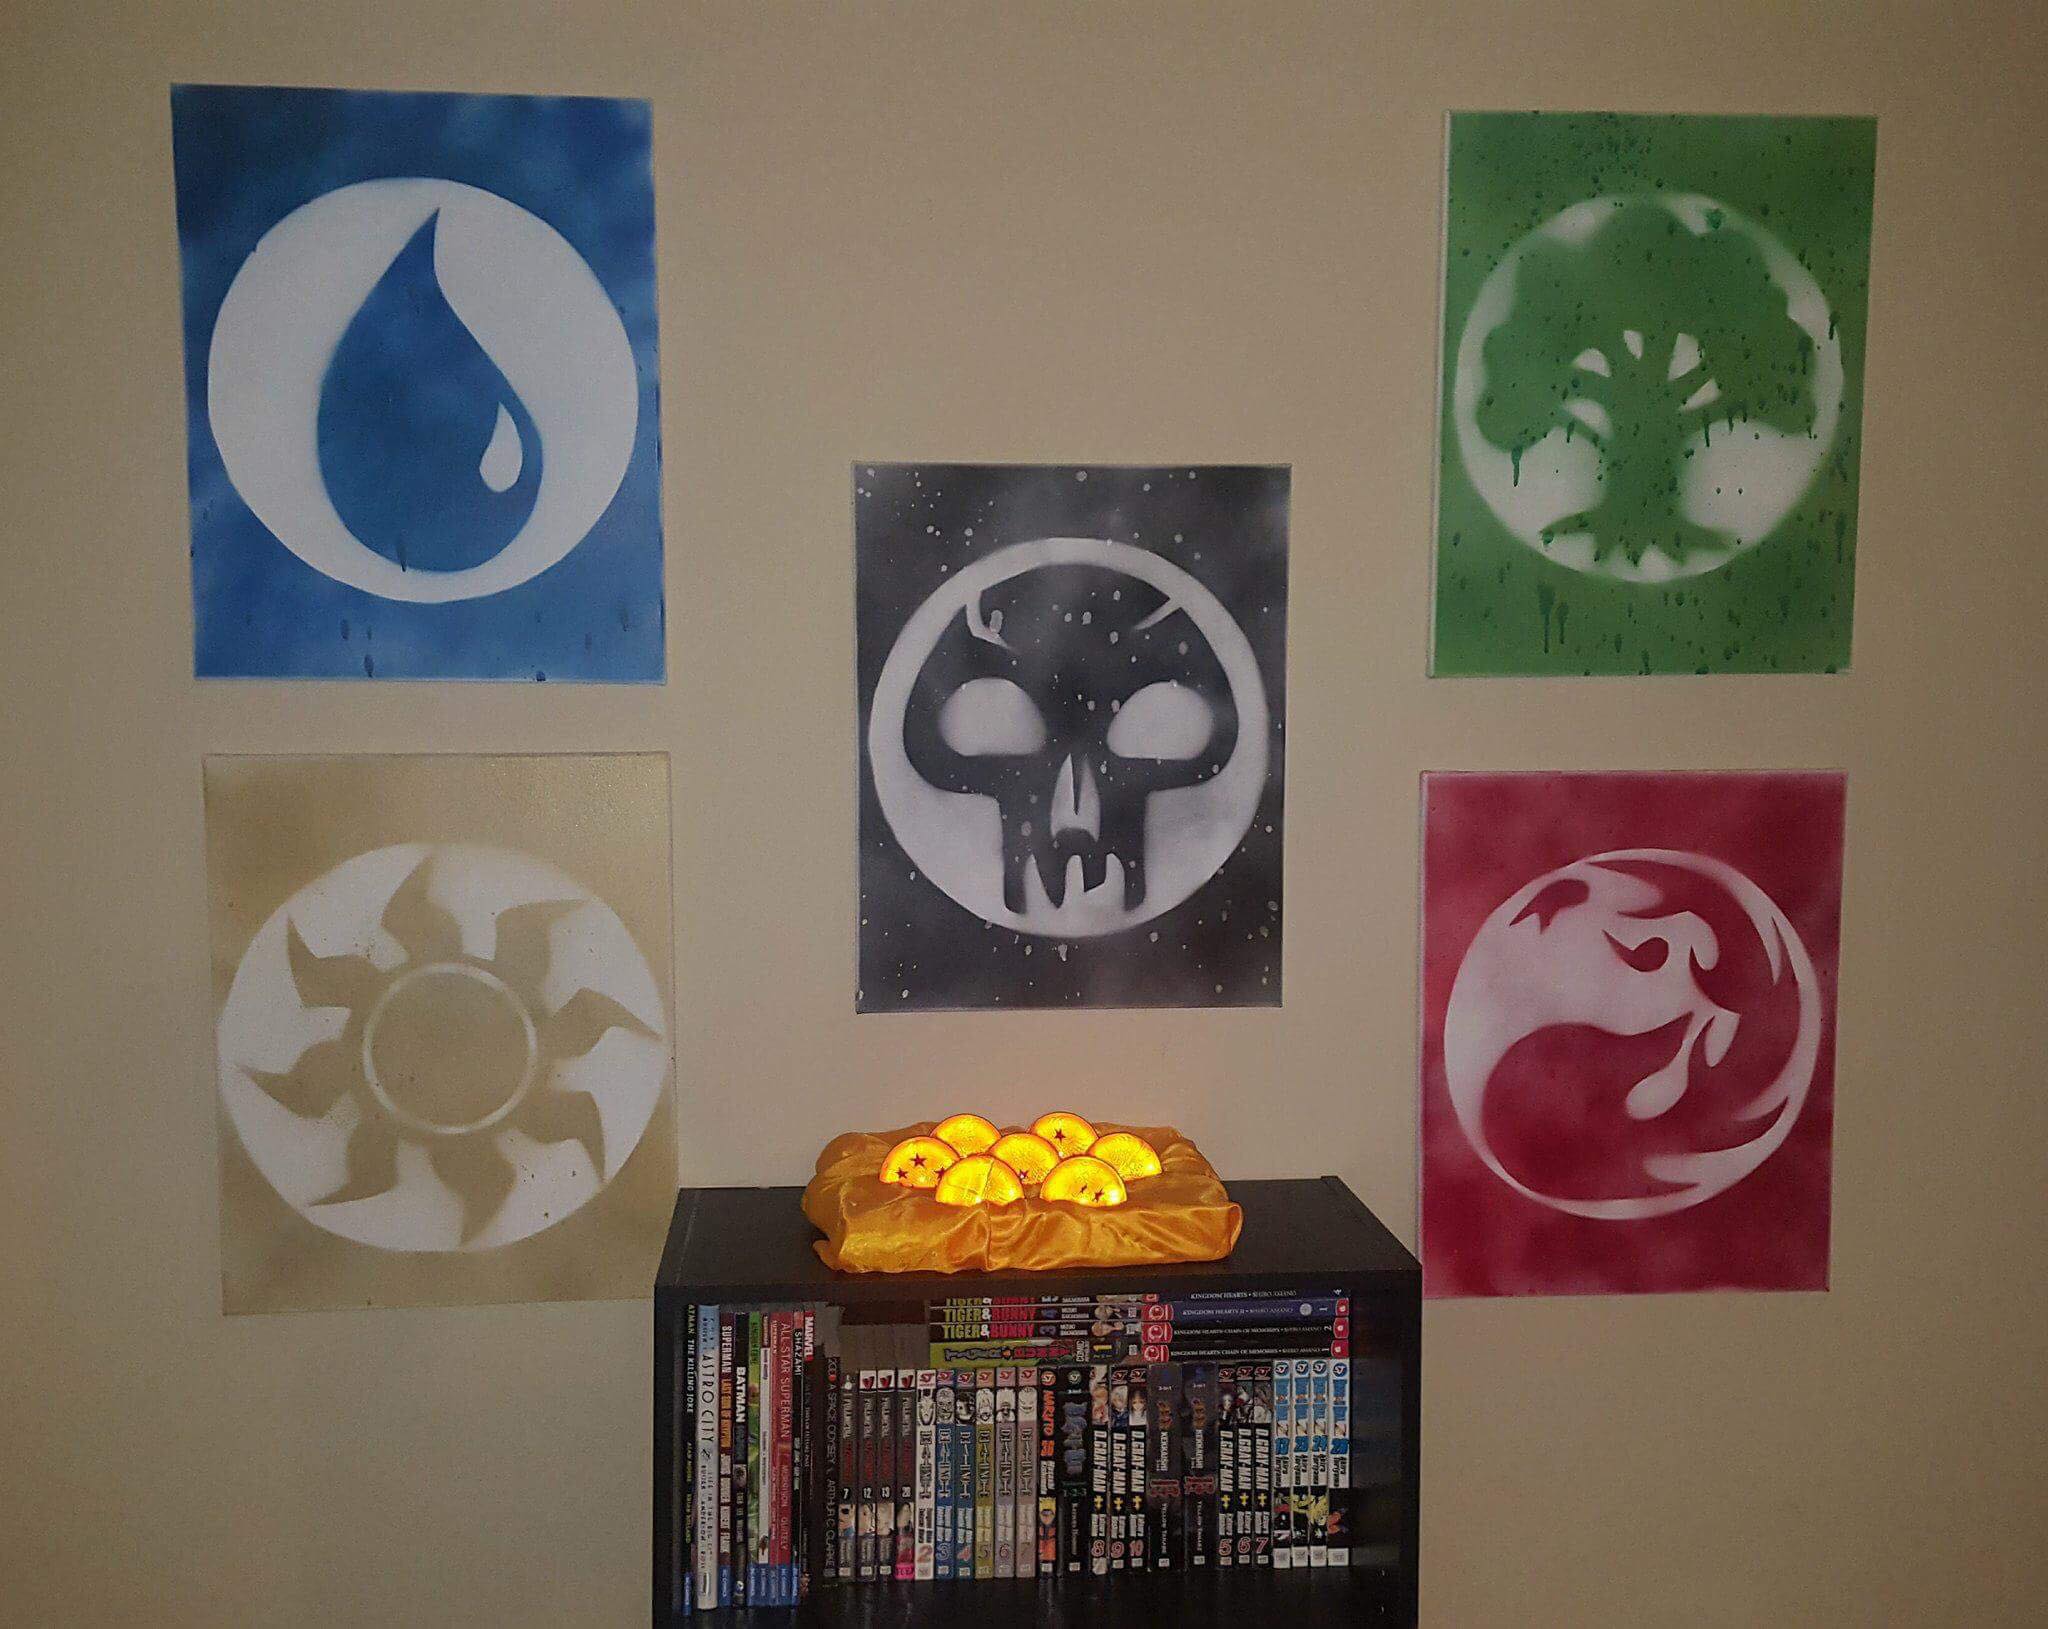
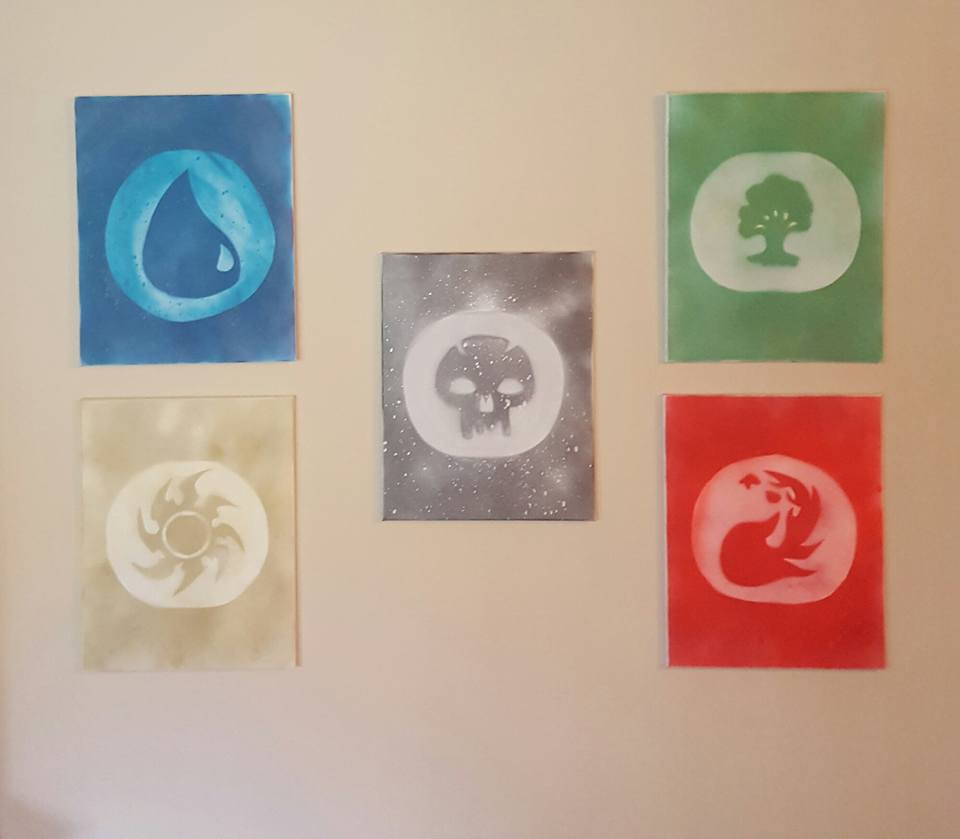
See a difference between my first photo and my second? Well in my second, I tried to be artsy and draw out my cutouts by hand. As you can see, it didn't end up being horrible, but it definitely didn't do as well as the first image. Why did the first image do better? I went to UPS and printed out the symbols. It was a simple cut out after. A lot less time and effort needed, with much better results.
Don't these look much better? So here are a few easy steps to get what you need.
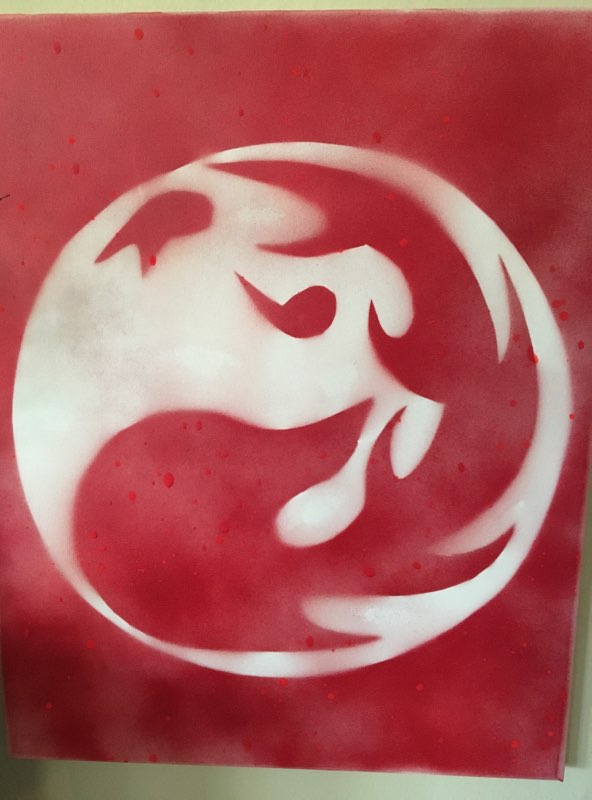
- Go ham on the entire portrait. Wait what? Thats right, pick you "main color" of the two colors and give it a nice coat.
- Next we're going to want to use that secondary color to light spray in various areas. When I do this I like to pretend I'm a real painter and splotch with a paper tower to give it more texture. Probably screwed up the painting doing that, but hey, don't questions my creative flair! Again, I'm no artist.. so if I can make these so can you!
- Now I'm going to take my cut outs and tape them over the painting. I'm also going to cover the sides so only a circle will show, with where my symbol will be cropped out.
- Go ham With the white spray paint!
- Feel accomplished. Don't bother touching it up and throw it on the wall. Have a victory snack. Don't touch my cookies though!

Lets argue that canvas art takes up too much time or that the dollar to print from UPS is too much much money. That's fine; there are still plenty of options! I'm sure that, like me, you have collected a lot of MTG products over time. Either it be extra playmats or arts from GPs. Maybe you recently got that cool Unstable poster. Perhaps you are one of the lucky few that have the Power 9. These are all excellent wall mounts! Aside the Power 9, you don't need any fancy frames. Thumb tacks or clips work great for playmats and posters.
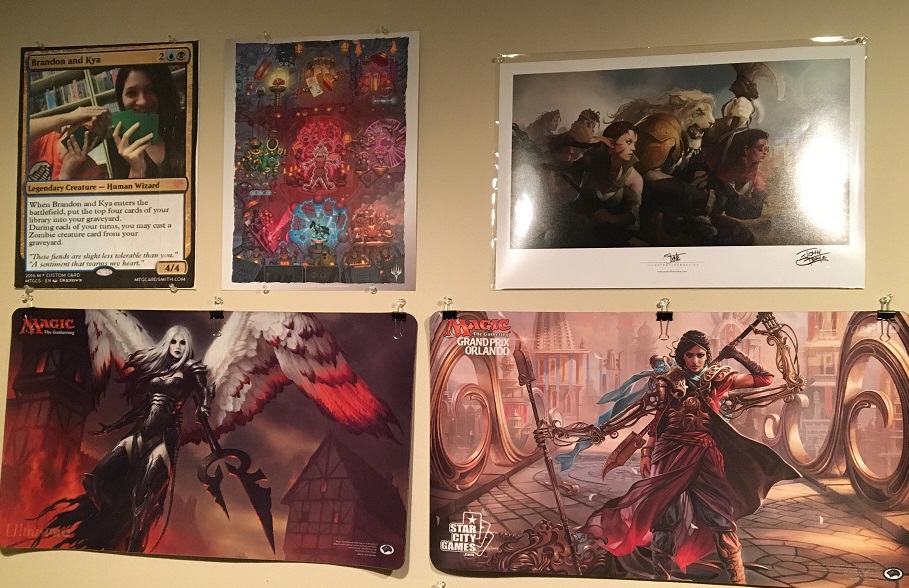
Brownie points if you can ever get your hands on those awesome cut outs that the LGS eventually throw away. I missed my chance at the Avacyn cut out and have been kicking myself since!
Mox League
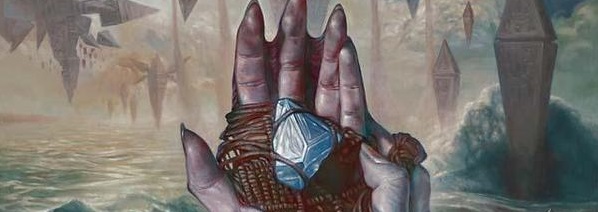
Well now that we have our EDH room ready, so let's kick it up a notch! One great aspect of playing from home is that we can control who is at your house. This means there is a set number of expected regulars as well as those being regulars you can trust (hopefully). With this in mind, we can make some MTG Jewelry to share among your friends! Feel the high life floating above those regular peasants while wearing your own Moxes! Let's see the Rules Committee try and ban these, shall we?
Or better yet, why not make these little accessories achievable? Set up monthly leagues with your Moxes as a temporary prize! The Sapphire League one month! The Emerald League another! After 5 months only Mox wearers can enter the Lotus League to take the ultimate prize and proclaim yourself the EDH Champion! I'll maybe go into setting up a league in another article, let's just enjoy the quick process of how to make these:
So we have a general idea of how to 3D model from the cookie cutters. Using the card images themselves, you can model around their basic shapes. Note I REMOVED the gems in these models. That's because 3D print isn't going to make them shiny!
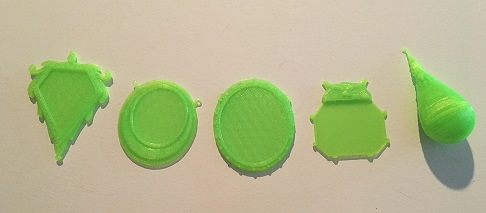
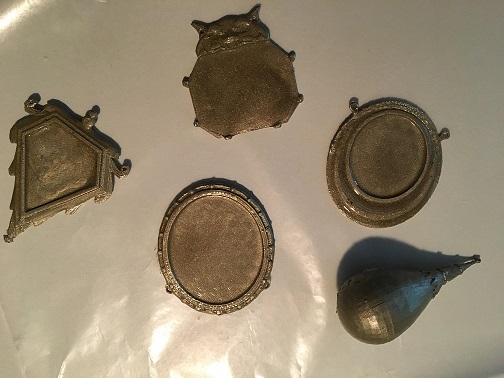
Also the beauty of removing the gems is easy spray painting! Using some basic gold we can add the layers a few times to give that old golden look. Don't worry about the Pearl though, we can paint over that!
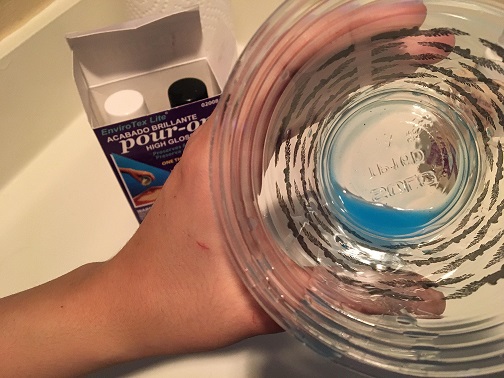
Now for the resin. Be forewarned, I hate this part. There are some easy resins you can get at craft stores for a nice, clean 1-1 ratio on the pours. However resin doesnt give us the color of the gem we need. So what I did was add in a drop of blue ink. It wasn't perfect, but I got a nice blue goo going. If I was going to make several of them at once, I could dilute it even further, but this was all I needed. Then I pour them into my gem molds. I made the molds out of 3D but I'd go the extra mile and make them out of actual mold to save the headache. I would look up various Youtube tutorials before playing with Resin though!
After your gem is done the only thing that's left is to glue them together! Getting an old chain that you can get at almost any craft store, our Mox is complete! Note my mold was 3D so there's a bit of a texture on the gem. Another reason to go real mold 😛
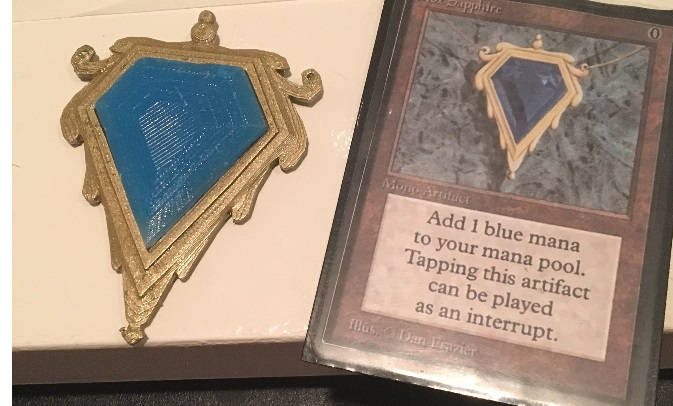 Despite black being my favorite mana source, I have to say the Saphire is my most proud Mox. Shameless selfie time! Starting a trend with our authors? Everyone else going to selfie this month? No? Aww...

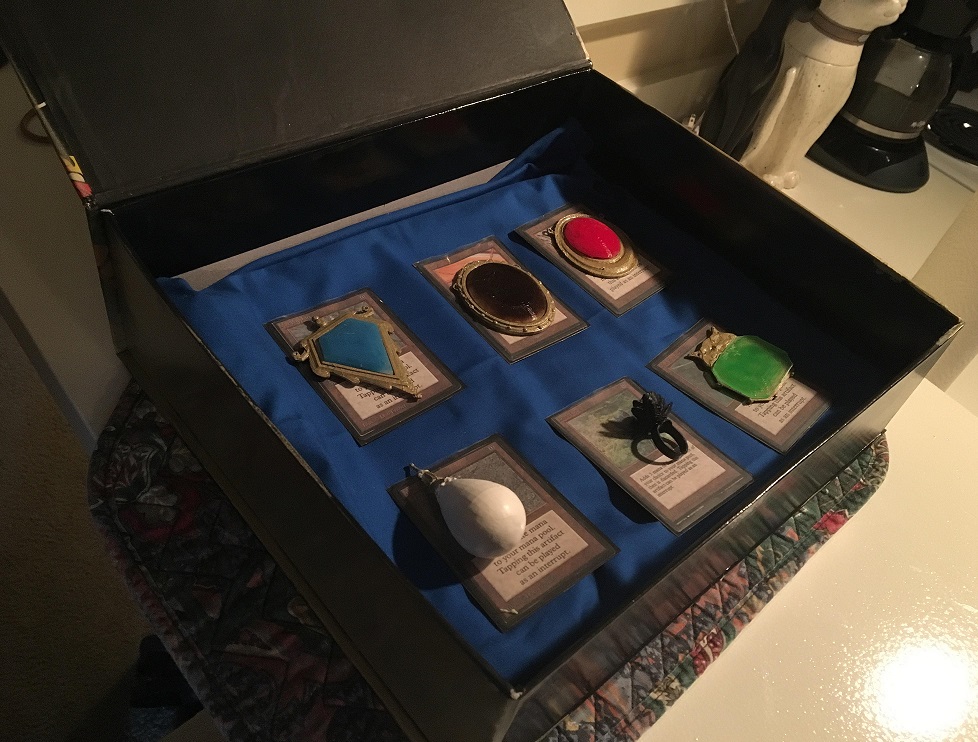
Now that our Moxes are completed, we need a jewelry box worthy of them! Remember those dragon balls you saw in my previous image? Well I don't need that box anymore! So I took the same gold paint and let loose on the box. I apologize for not taking pictures of this part, but for the blue cloth I was able to get it for super cheap at Walmart. I also got some of that fluffy insulator and cut card holes in. Using the blue cloth, I was able to make the card impressions easy. Now I laid down each Mox card and their jewels over it. Voila!
Mox Download: Moxs
Closing Thoughts
I hope everyone enjoyed my brief Mana Stewart article. Ideally I like to imagine that this also sparked some creative ideas for everyone on what they can do to spice up their homes to be more gamer friendly. Being a budget girl, I can completely understand not having the funds to renovate an entire room or home. However everything listed above was super cheap to make and can be slowly completed over time.
One thing that I would like to also add in is please don't neglect your local game store! Although playing at home with a closed group of friends is a great break from everything, I definitely do not want to give the impression that I believe people should be playing at home over the store. These stores are the beacons that bring us fellow players together and help us create amazing groups to play with. Most of these stores don't ask for a lot either so please don't take advantage of them. If you're not dropping money on paid events but spend a large chunk of your time at the store, buy a drink or a snack while you play. At the very least consider that your entry fee and enjoy the environment your LGS provides you.
For those though that are not fortunate enough to have a good LGS near you, hopefully this article can help guide you to make your own beacon for your area. Let me know any creative works you've done in your own home. Please share in the comments below so others can get even more ideas. Also let me know if you'd like to see my next article be about starting a Commander League or to go back to making fun decks for everyone to play.
Lots of Love,
Kya

EDHREC Code of Conduct