Pure // Simple — Lose Weight, Not Games Part Two
March 19, 2018 by
Jeremy Podczerwinski 

Last time on Pure//Simple, the article series that explores the why behind the best cards in the Commander format, I went over a few “I win” buttons. Cards that when you cast them in the right situations and you’re practically guaranteed victory. This time, I’m completing the list with a few more powerful Commander spells, all while giving you a few strategies to stay alive when facing them. Just because we’re into March doesn’t mean you can’t still win more games this year than last. Or at least not lose horribly. Small victories.
Insurrection
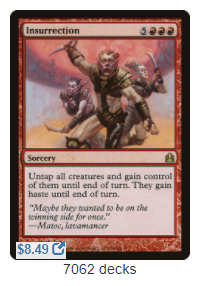
Insurrection might be the most famous “I win” button of them all. For some more seasoned Commander veterans, just hearing the name uttered at certain points of the game is bound to bring flashbacks to games where you and the other players were in a stalemate, that is until everyone’s creatures got stolen and sent right back at their respective faces. Yet, it seems that Insurrection’s notoriety has waned a bit over the last few years. I know I haven’t seen it in a game in a long time with my playgroup.
But why did Insurrection lose popularity? I think the answer is manifold.
- I think many people now see it as the free win button that it can be. Let’s look at it this way; theoretically, you could not play a single other spell in the entire game, only hitting your land drops each turn while your opponents build up their Voltron creatures, large swaths of tokens, or angry infectious hordes. All you have to do is have 8 mana and Insurrection.
- If your opponents are playing anything that isn’t creature-based, then Insurrection does absolutely nothing. This card rolls over in a heartbeat to decks like spellslinger or control. The best it might be able to offer is moving blockers out of the way, but spells like In Garruk’s Wake can do the same.
- Decks are much more likely to have free-to-activate creature sacrifice outlets, like Ashnod’s Altar (played in 11% of all decks on EDHREC), than in the past, making Insurrection far worse than before, since players could just get rid of their most potent threats to stay in the game.
Insurrection might just be a casualty of modern Commander deckbuilding and in contention with the spirit of the format. However, that doesn’t mean you won’t have to face it in a pod. Aside from the aforementioned free-to-activate creature sacrifice outlets, setting up a barrier to attack like Propaganda can at least dissuade the mass of hasty creatures headed your way. A player using 8 mana on one turn is likely to have very little left over to pay for effects like that. Beyond that, something like Settle the Wreckage, while it will give enormous value to the attacker, will stunt their plans in the interim, allowing the table to pick them apart afterwards.
Craterhoof Behemoth
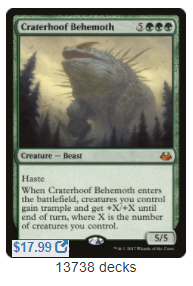
To riff a bit on a song from the 90s, “Hoof, there it is!” Craterhoof Behemoth feels like the inverse to Insurrection in many ways, despite both costing 5 generic mana and 3 pips. Instead of rewarding you for having other players in the game with huge threats or large armies, Craterhoof Behemoth rewards you for having huge threats and large armies.
It’s up to you to determine the amount of skill that it took to get to the point that Craterhoof Behemoth wins you the game, but you aren’t going to win on the beast’s back alone; you need help. You actually have to cast other things and do other stuff, not sit around and then win like Insurrection can do for you. I know that the ‘Hoof gets a little shade for being a seemingly too-easy route to victory, especially when paired with its best buddy Avenger of Zendikar, and even more so when dumped onto the board via Tooth and Nail (which was the other contender for the green slot in this article), but before ‘Hoof, there must have been some part of the game where a board wipe or removal would have made Hoof’s effects negligible. Perhaps the other players got out-politicked and didn’t use the removal they should have. Or possibly, the Craterhoof Behemoth player had a well-timed Heroic Intervention?
The point being is that outside of certain circumstances, there is usually a spot in the game that would have rendered the Craterhoof Behemoth useless, and that window passed. Coincidentally, arguing why Craterhoof can be skill intensive is exactly the path to take to see how to beat it. Craterhoof Behemoth capitalizes on a moment in the game, usually when most players are tapped out, and the board is swayed in favor to the ‘Hoof player. It allows that player either the extra damage to knock out most, if not all, remaining players in one fell swoop, or it give that player the reach, in the form of trample, they needed to close out the game.
Knowing this, being able to spot that position in the game is key, and holding up whatever answer it is that you have, be it a Counterspell or my personal favorite option, a Fog that only prevents damage being dealt to you, and no one else (Might I suggest Selfless Squire or Druid’s Deliverance?). Might as well have the ‘Hoof do some work. Generally, you can blunt a ‘Hoof even before it hits the board by keeping that player’s board small. It’s not difficult to spot the Craterhoof player anyway:
- Are they playing green?
- Are there a lot of creatures and/or tokens?
Answer yes to these and get ready for the big beast, or something like Overwhelming Stampede, the game plan should be the same.
Maelstrom Wanderer
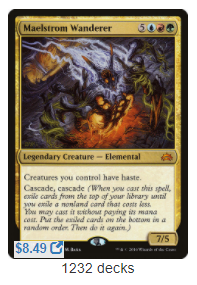
You might wonder why I picked Maelstrom Wanderer over other multi-color commanders that are much more ominous when facing well-built versions of them like Zur the Enchanter, Breya, Etherium Shaper, or Prossh, Skyraider of Kher. Frankly, although those commanders lend themselves to powerful decks, they require some outside assistance to ruin your gameplan. Maelstrom Wanderer does not. So although a Maelstrom Wanderer deck might not be as powerful as other decks can be, the commander allows for huge swings in board position every time it is cast, and often times it ends games.
The Maelstrom Wanderer strategy is fairly simple: ramp into Maelstrom Wanderer. That’s about it. From there, you can gain massive value just on casting your commander alone. With a little bit of library manipulation (Scroll Rack, Sensei's Divining Top, etc.), you can make the 8 mana you spent to cast Wanderer net you up to 22 mana in cards (and that’s without any other cascade shenanigans you might have). And if those free cards are creatures, you better believe they are barreling down on somebody, since Wanderer also give haste.
The thing that a lot of players often miss about Maelstrom Wanderer is that the Wanderer player WANTS you to send it back to the command zone, be it through a board wipe or a removal spell. It just gives them even more cards to cast off of there library.
Fighting off a Maelstrom Wanderer deck can take two forms.
- Attack their mana development (which might be tricky if they are utilizing spell-based ramp in the likes of Cultivate, if only because mass land destruction may be frowned upon in your playgroup.)
- Make sure Wanderer never leaves the battlefield again. Cards like Song of the Dryads or Gilded Drake can really throw a wrench in their plans, since from their the Wanderer deck operates as mostly a good stuff deck.
Nim Deathmantle
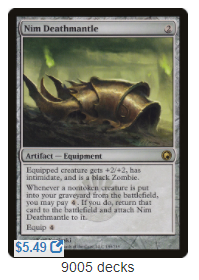
Let me make this clear before anything else: don’t EVER believe that Nim Deathmantle is in a player’s deck for “value”. On the surface it looks innocuous enough - Nim Deathmantle is a great way to use extra mana to return a recently dead creature. However, that’s not its main purpose. Don’t believe the player’s lies.
Nim Deathmantle is a combo piece, and you should always treat it as such. I’ve had players claim that it’s a value engine - and then a few turns later I’m “surprised” when they stick an Ashnod's Altar or something similar, leading to some combination of infinite mana, life or damage.
That being said, Nim Deathmantle by itself is nothing to worry about. It’s not kill on sight, but it is a card to definitely take note of as soon as you see it. It should be a warning, a beacon in the night, of the potential for abuse in later turns. Hold that removal for when the real threat becomes present. Luckily, the mantle is easy to disrupt, but you have to be aware of what combos with it. Here, let me google that for you.
Knowing Is Half the Battle
I hope that these last two articles highlighted a few of the ways you can quickly lose a game of Commander, and some ways to prevent that from happening to you. Of course, having knowledge of the cards that can turn the game on its head is very useful, but with the sheer number of cards available in our great format means that you’re going to see some strategies you aren’t prepared for. What do you do then? Let me offer some advice that you can take to any game in the future.
- Brush up on general Magic: the Gathering rules whenever you can. There are a good number of resources out there that will help you understand the intricacies of card interactions. Although you haven’t seen the particular cards in a game before, you might still be able to figure out how much they affect the game.
- Take a moment each turn to look at the board as a whole. We sometimes get stuck focusing on one or two things, or thinking about our own plans, to notice the other big problems going on. I’ve seen people sneakily ultimate planeswalkers, draw tons of cards, or build up huge armies, only because the other players were fighting among themselves.
- Know your responses. After looking at the board, think about what you have in hand, in play and in your deck that can deal with the current problems, and move forward from there. If you find that you’re vulnerable to certain things on the board, either figure out how you can dig your way out of it or start politicking to have it solved for you.
Ultimately, you will always encounter situations that you can’t sneak out of. In those cases, take an inventory of if you could have prevented it had things gone differently. If your deck had no way of dealing with the threat, you might want to look into ways to improve the build. If it was a play error on your part, then you’ll know what you need to work on. The knowledge you gain from losing outright will make you a better player as long as you don’t ignore it. How else do you think I was able to write two articles on the subject?

EDHREC Code of Conduct